Today I want to speak to you briefly about the first steps you need to take after purchasing your new Autel tool or tablet and before you start using it on a vehicle. No matter if you’ve just purchased a TS508 TPMS Tool or one of our new MaxiBAS battery analysis tools or any of our Maxisys or MaxiIM IM608 / IM508 tablets, you need to take the time to register and update the software on these tools.
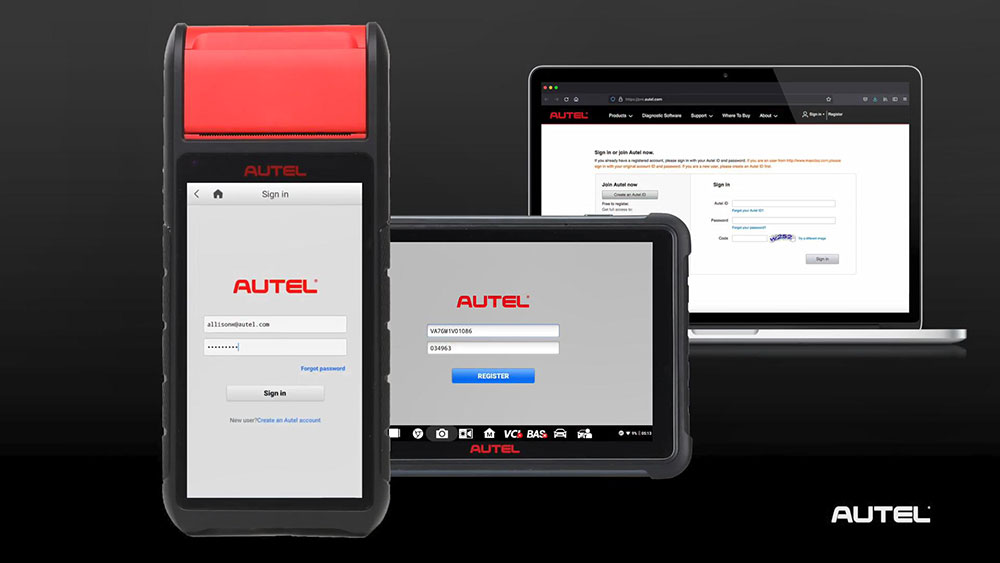
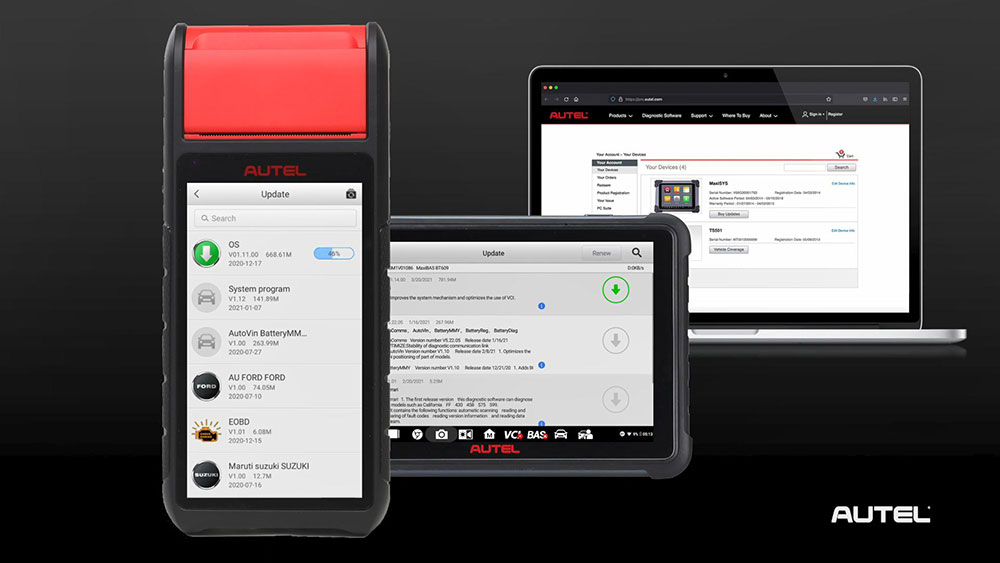
We know every tool manufacturer you buy from urges you to register their tools and it seems like maybe a waste of time when you just want to start using them.
But Autel products, unlike the lawnmower or the headphones are essentially computers and like every computer, they run on software, Autel doesn’t just release software updates annually or even semi-annually, some of our tools are updated as frequently as monthly, we are not only offering new model year coverage but we’re offering revisions and bug fixes to the current software, so we can get the car repaired the first time every time, remember when you get your new Autel tablet or tool, when you take it out of the box, be sure to register it.
Part 1: How to create an Autel account?
Users that already have accounts and other Autel tools can add a new tool to their pre-existing account be advised, though some of the smaller DIY products do not require registration, but they may be eligible for software updates.
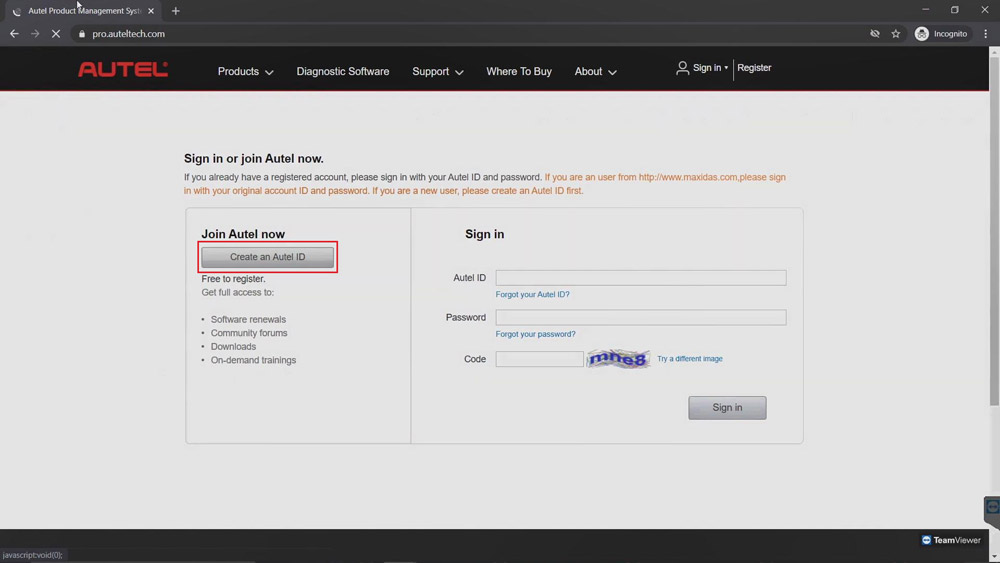
1. Please visit https://pro.auteltech.com/ from your PC.
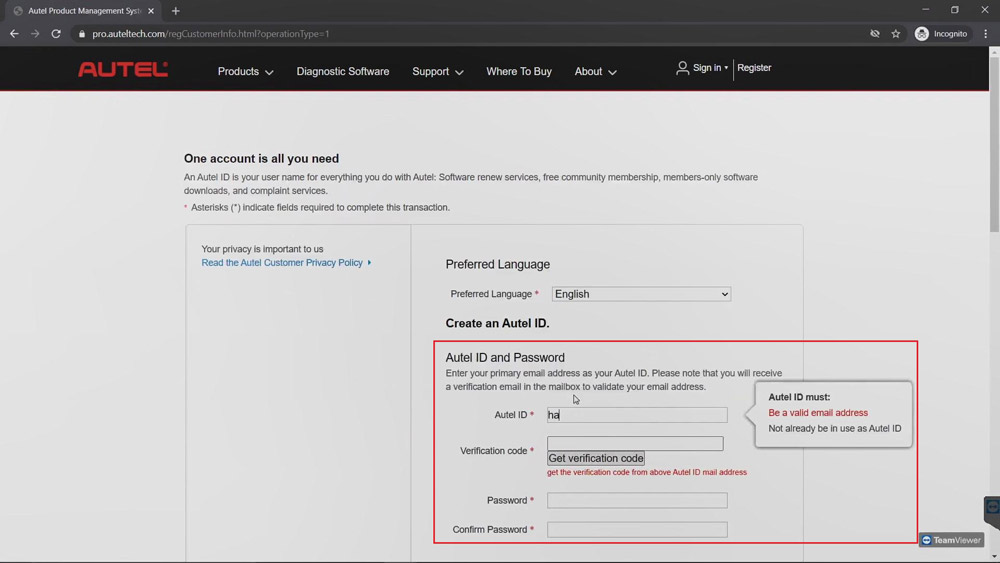
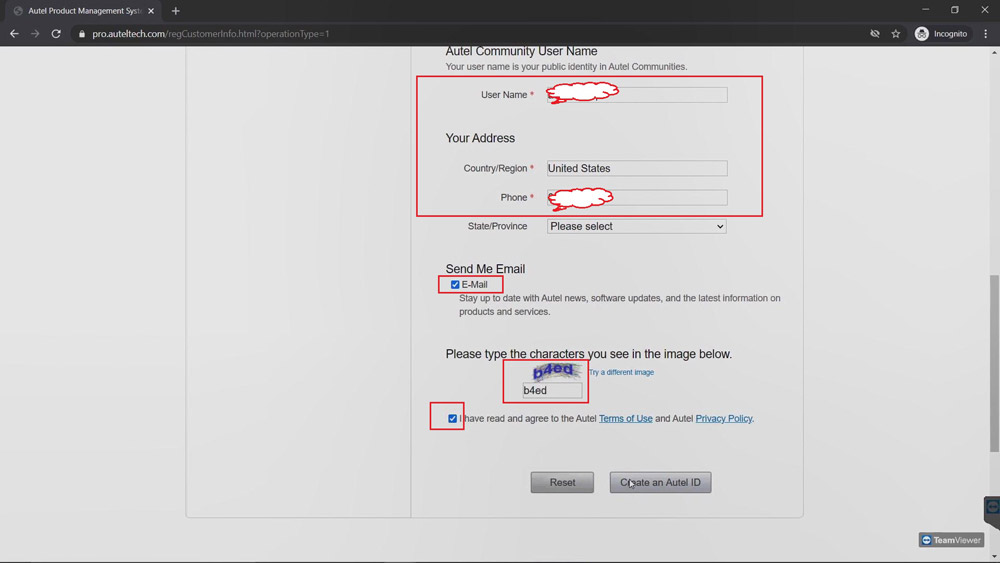
Select “Create an Autel ID”, this will be the ID that you use to sign into your account with, it has to be a valid email.
So after entering your email, click “verification code”, the site will automatically send you a six-digit code to your email. This is done to make sure you entered a valid email address, you will be given 60 seconds to enter that verification code, so check your email and either write down the code or copy and paste it to enter it back on the verification code line, if you don’t see that verification code in your inbox, please check your spam or junk folder.
Once the codes is entered, continue with filling in your info.
At the bottom, enter the four characters that show you listed in the image, you will then need to check the “send me email box” and then “agree to the terms”.
2. sign in Autel account
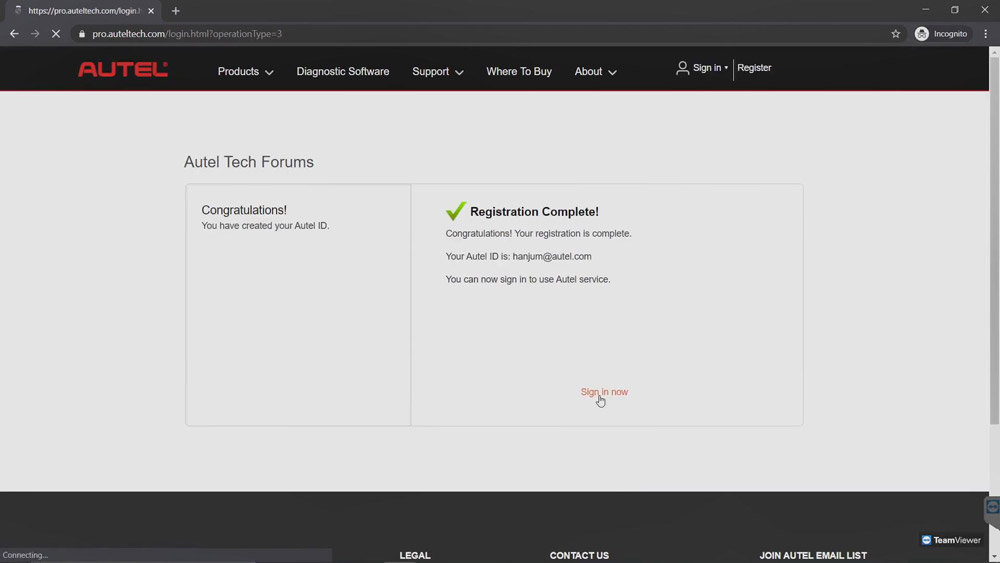
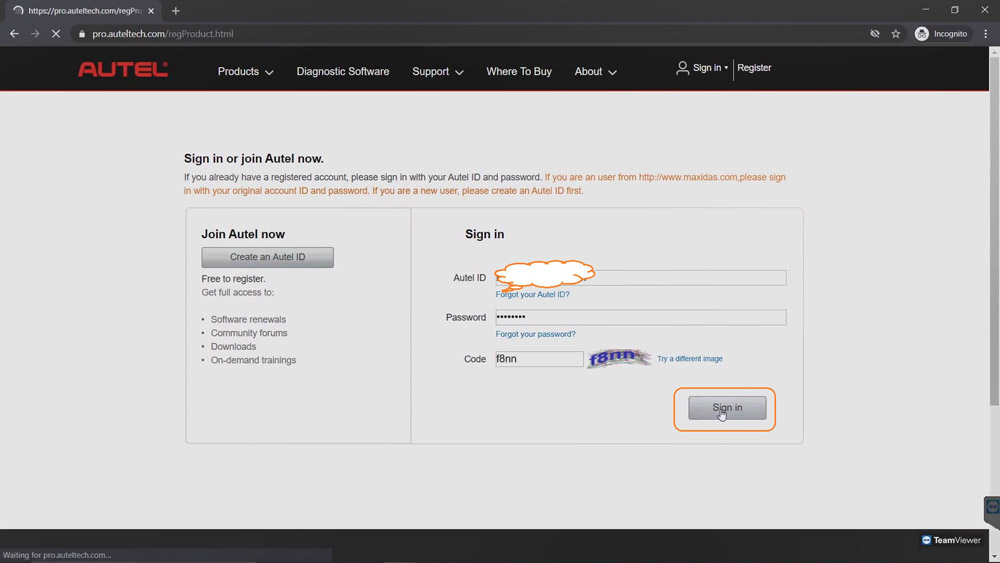
Now it’s time to sign in to your Autel account, this is also done by visiting
https://pro.auteltech.com/, remember your email address is your Autel ID when you’re signing in.
Part 2: How to register your Autel tool?
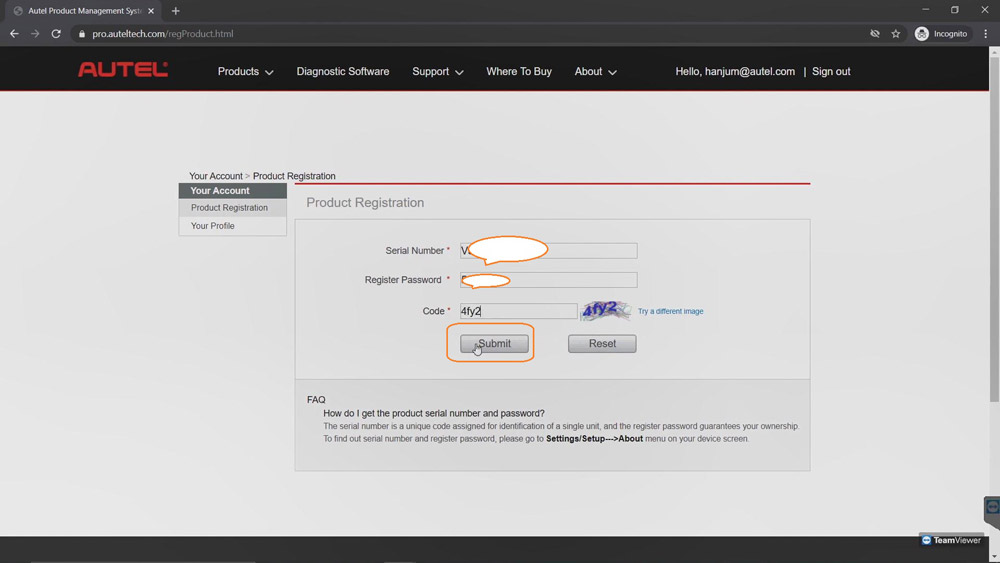
After you sign in, you’ll need to register your Autel tool.
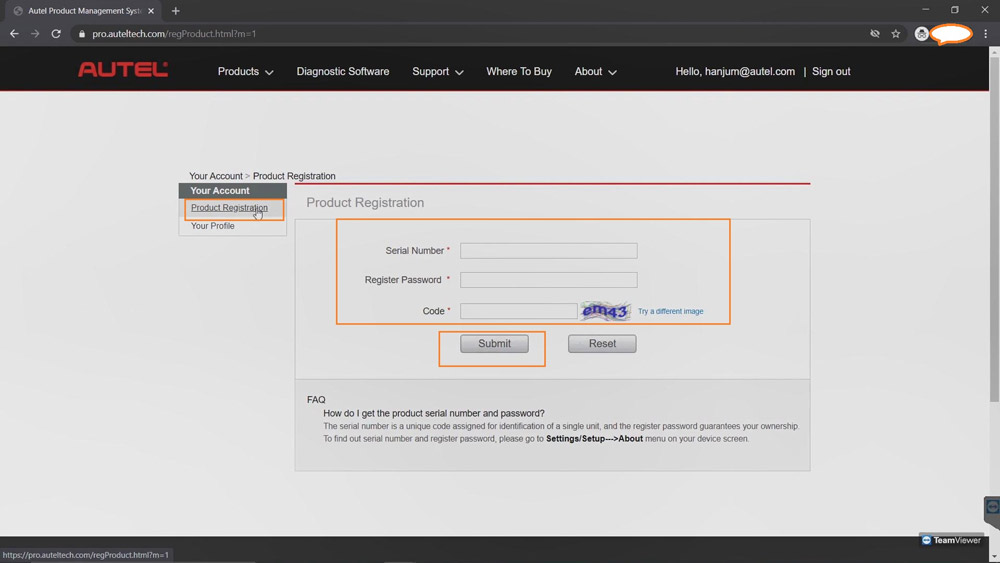
Serial Number: you can locate the serial number and “Register password” in your device when you power it up. Some tools you have to click on “Settings” and select the “About” app. On some of Autel smaller DIY products, the information could be found under my device.
Register password: is a six digit code, this code would only be used to register your product, it is not the password you created to login to your account.
After you’ve entered the serial number and register password, enter the code shown on the screen, then click “Submit”.
Good to know:
Now your Autel Account and tool have been successfully registered.
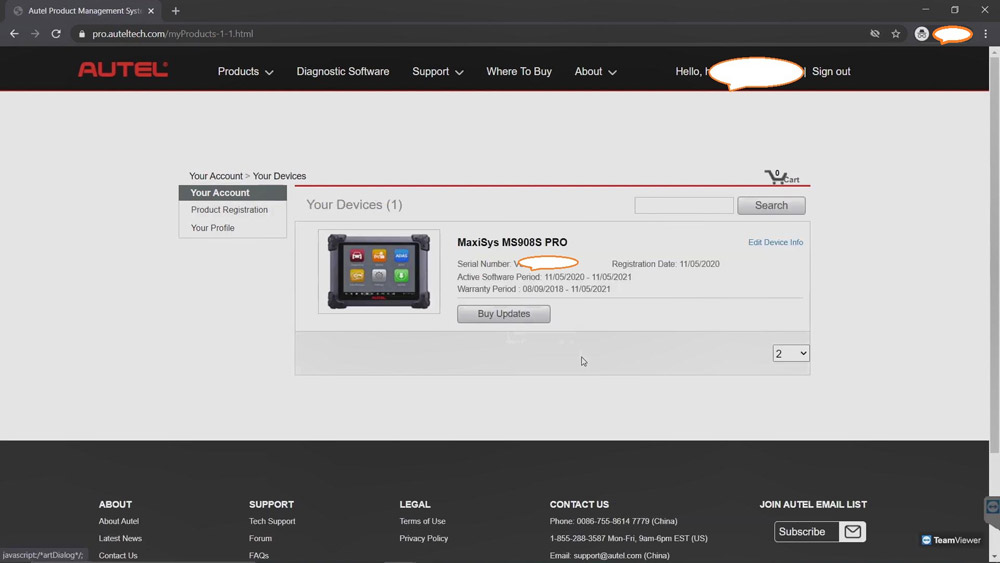
1. Now if you’re already an Autel user and you already have an account prior when you sign in, click on “Product registration” on the left side of the page and fill in the information required. Once again, please note the register password is a six digit code found inside your device’s “About” or a tool information screen.
2. You can add as many Autel tools as they want to the same account, you do not have to create multiple accounts each time you get a new tool.
:: برچسبها:
Autel account registration process ,
:: بازدید از این مطلب : 198
|
امتیاز مطلب : 0
|
تعداد امتیازدهندگان : 0
|
مجموع امتیاز : 0

